GO TO MARKET FASTER
NE Print Shop
If you need anything 3D printed, there are two alternatives: Print it in-house, or get it 3D printed somewhere else. And this is where 3D printing services step in, and a 3D printing service will bring to life your next prototype idea.
The idea of using a 3D printing service is to outsource your manufacturing workflow for the particular model. You need to give your model’s design, choose your material, and customize your settings as inputs. The service provider will take care of the manufacturing and post-processing aspect, and you’ll receive a ready-to-use, 3D printed model.
3D printing services are more suited in a professional scenario, where the clients need manufacturing expertise, advanced materials, and a well-manufactured 3D printed component. However, considering the versatility of 3D printing, even individuals who need a one-off model of their design can get their idea 3D printed.
Even if you have your 3D printing setup, it’s challenging to meet the versatility that you will get from a service provider. Listed below are some of the significant benefits of using 3D printing services.
You get access to a wide range of materials, thus letting you print anything you want without having to worry about its manufacturability. Thermoplastics, resins, and even metal powders, you can 3D print your prototype in any material depending on its end-use.
With a 3D printing service, you can print your model as big or as small as you want it. You need not worry about the build area about the model size, and you can get your entire model 3D printed in one piece without having to split the design.
It is time-consuming and money-intensive to buy a 3D printer, set it up, and tune it to print your models. If you need to 3D print a single prototype or a low-volume part, opting for a 3D printing service is better. They can 3D print your model in a matter of days, thus reducing your lead times and saving you money on owning and operating a 3D printing setup.
3D printing services are professionals in additive manufacturing, and you can expect the highest levels of quality from them. You’ll have access to experts in 3D printing if you need any assistance, and from a business viewpoint, a 3D printing service provider will try to deliver parts with the highest quality.
We’ve discussed what a 3D printing service is and its benefits. But, how do you get your design 3D printed? What does the workflow look like, and what are some common steps? This section will cover everything from uploading your design to ordering your 3D printed part and everything in between.
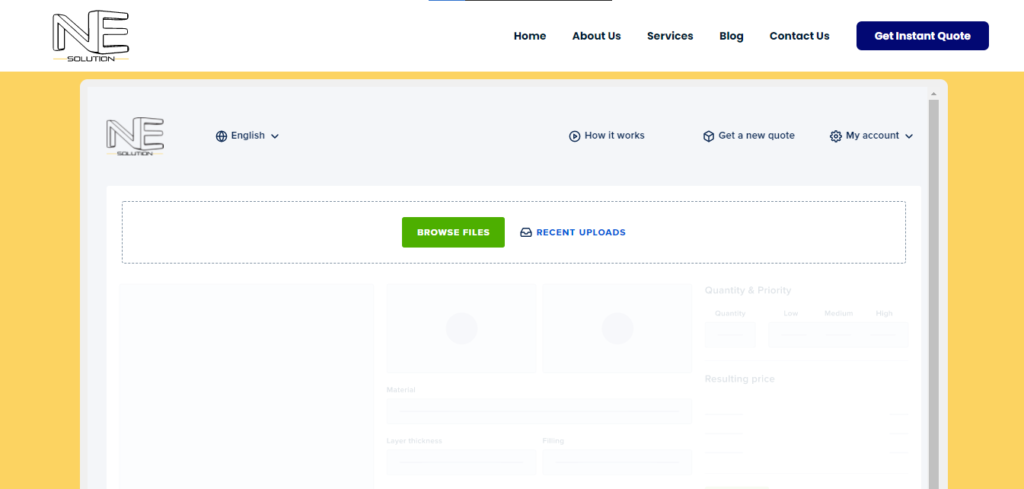
The initial step is uploading your file to the service provider’s website. Depending upon the supported file formats, you can either upload a file directly from your design software or upload the file in STL format. Standard file formats include STL, STEP, STP, obj, 3mf, and igs.
Once you’ve uploaded the file, you’ll be able to visualize the model in a viewport on the website. You need to check the model’s dimensions and units in the viewport and alter them depending on your preferences. If the service provider’s website supports it, it might even warn you of any errors in the model’s design, leading to any print failures.
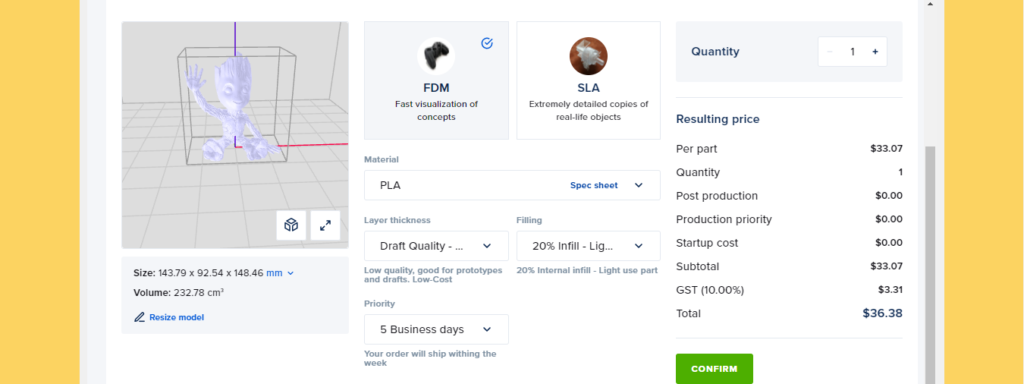
In this step, you select the manufacturing method for your object. Most of the service providers commonly offer Fused Deposition Modeling (FDM), Stereolithography (SLA), and Selective Laser Sintering (SLS) methods. Your preferred method will depend on your budget, needs, and final application of the 3D printed part.
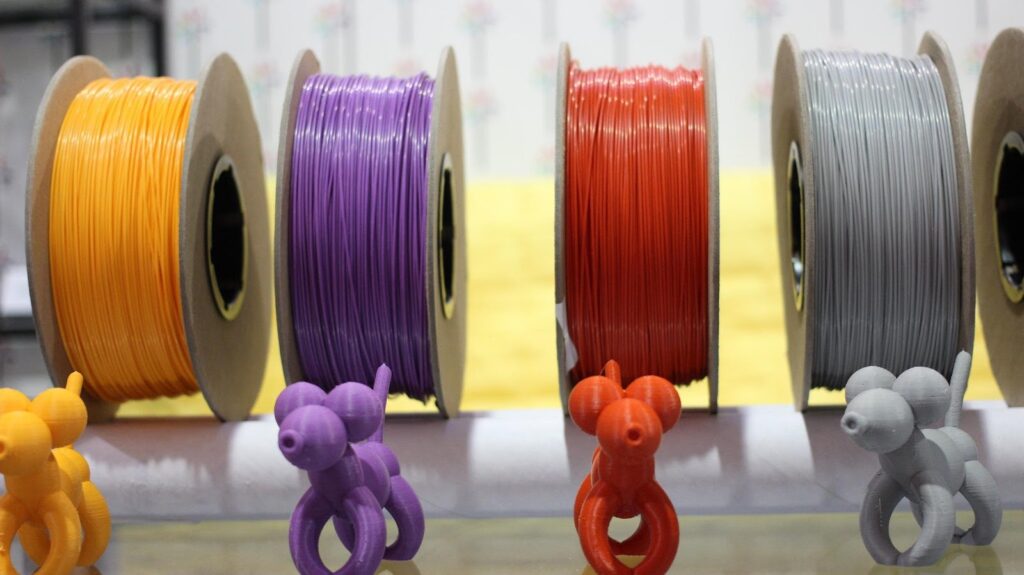
Plastic will be the primary material used in the case of the FDM technique. You can access a wide range of thermoplastic materials with FDM, and parts produced via this method are cheap, easy to post-process, and versatile in their applications. The downside is the poor surface finish, quality, and low strength when using basic plastics.
In the case of the SLA method, you get to use photosensitive resin material. SLA 3D printing produces parts with a higher surface finish that are almost difficult to distinguish from an injection molded component. Some of the typical applications of SLA 3D prints are in the dental, orthopedics, jewelry, and model manufacturing fields.
SLS 3D printing is primarily used for manufacturing industrial components. Nylon powder is the most commonly used material that can be mixed with other additives depending upon the end application. It is the most expensive technique of the three and produces the highest quality of parts. If you want functional prototypes or print your model in small batches, SLS 3D printing will best match your needs.
Once you’ve selected your 3D printing technique, the next step is to choose the material of your choice. In this case, let’s narrow it down to FDM and SLA materials.
The range of thermoplastic materials will vary depending upon the individual service provider. Yet you’ll find that most of them will have PLA, ABS, PETG, TPU, and Nylon in their catalog. PLA, ABS, and PETG cover a wide range of use cases, and if you need a basic, non-functional 3D printed part, these materials will suffice your needs.
Nylon, Polycarbonate, ASA, and metal-filled plastics are used for end-use prototypes and functional parts where strength is the main criteria. These are generally more expensive and are used majorly for producing engineering prototypes.
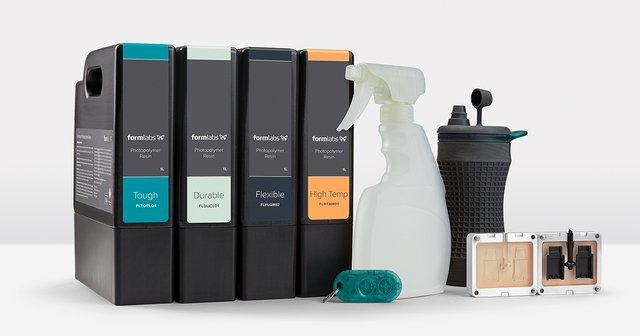
In the case of resin materials, the name of the resin is clear enough to denote the application. You’ll have to choose between standard, tough, jewelry, and dental resins. Standard resin is used to produce non-functional models only, and tough resin is an engineering resin used to create parts with high strength characteristics.
And if you want to niche down, jewelry and dental resin are applications specific materials specially formulated to be used in those particular applications.
Once you’ve selected the 3D printing method, and the material, ensure that you’ve dialed in the settings correctly. How you configure the settings will dictate the quality, strength, and final appearance of your 3D printed part.
Depending on their capabilities, each service provider will have different settings pertaining to the 3D print. Depending on their machine settings, you will range from draft quality settings (0.28 mm) to high-quality (0.1 mm). To keep things simple, we will focus on some of the basic yet essential settings, which will be standard regardless of what method or material you choose.
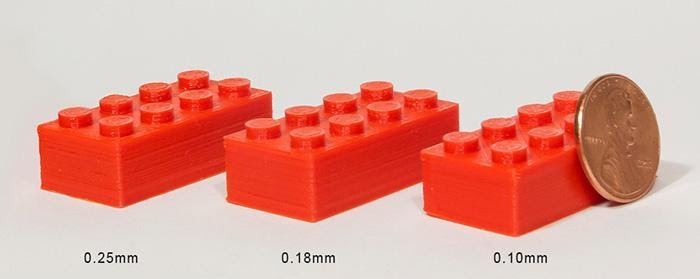
Layer thickness indicates the thickness of a single layer of your 3D printed component. It is the most critical setting in 3D printing any part and dictates the strength, surface finish, and the time taken to 3D print your part.
The smaller the layer thickness value, the better the quality and the aesthetic appearance of your 3D print. Thinner layers result in a smoother surface finish, as the layers are more closely stacked together. However, a smaller layer height increases the printing time, which might directly increase the lead times for your 3D printed part.
On the other hand, a bigger layer height will considerably reduce your 3D printing time. Thicker layers will also increase part strength as they have more surface area. The downside is a rough surface with poor quality and evident layer lines.
If the model’s aesthetic appearance and overall quality are your priority and you have no issues with long waiting times, you should opt for a lower layer height. And if you want a quick turnaround time, a more robust print and surface finish is not a concern; you can choose a draft quality setting with a higher layer height.
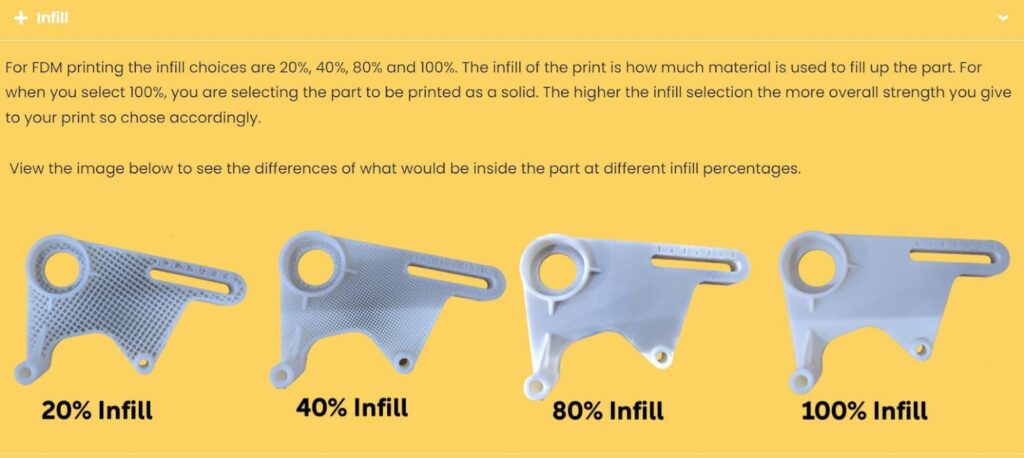
3D printing lets you control the density of your 3D printed component. You can vary the “infill” of your model and choose how hollow or dense you need it to be. This setting affects your design’s overall weight, strength, material use, and printing time.
Infill settings are selected as a percentage of the overall volume of your part. For example, you will find that the 3D printing service will give you options to choose 20%, 40%, 80%, or a 100% infill. The setting value is how much of the internal portion of your model will be solid and how much of it will be hollow. So, a 20% infill means 20% of your model’s internal volume will be solid, and the rest 80% will be hollow.
The infill setting even dictates the strength of your 3D prints. The higher the infill value, the denser the part, resulting in a stronger 3D component. It also means that it will take more material to 3D print the object, thus adding to the model’s weight increasing the print times and the print costs.
You need to consider the end-use and the functionality of your 3D print while setting the infill value. You can get away with a lower infill setting for small models, which won’t be subjected to higher loads. Whereas, if your 3D printed part will be used in a functional application and will bear extreme loads, you need to set a higher infill volume.
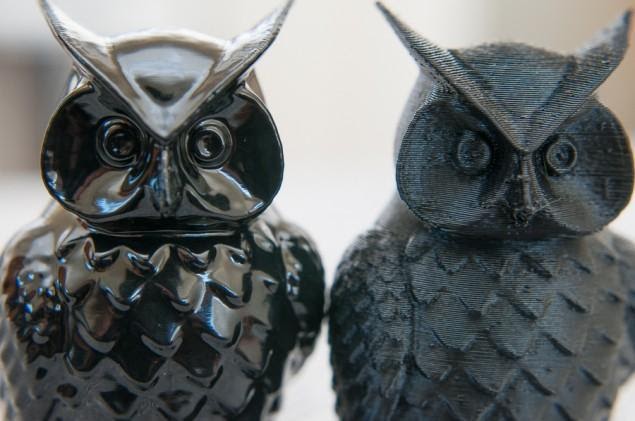
In FFF 3D printing, post-processing is an entirely optional procedure. You can choose to skip this step from your service provider and decide to do it for yourself to save some costs. However, depending upon the material, a little bit of post-processing might help to improve the overall quality of your 3D print.
In the case of ABS material, an acetone bath will fuse the layers, giving the 3D printed model a smooth surface finish, resulting in a model that will look like it’s been injection molded. And with other materials, a little bit of sanding will smoothen out the surface and prepare it for painting.
Resin post-processing involves the washing and curing of resin parts, which is mandatory for imparting the final mechanical characteristics. While most 3D printing service providers include these in their costs, it’s better to ensure them before placing the order.
Once you’ve set everything, all that remains is choosing your quantity, reviewing the costs, inputting the address, and placing the order. Once everything is done, you should have your 3D printed model delivered to your door within the stipulated time frame.
3D printing services are a great way to test your ideas without investing in an entire 3D printing setup. You get access to various materials and different 3D printing techniques and save time and money while obtaining the best quality. All you need to do is follow a simple workflow, understand the settings, and set them as per your needs.
While it might seem a little daunting at first, you’ll realize how straightforward the entire workflow is once you use them. We hope this article might have helped you to get started with your 3D printing journey and cleared your doubts if any.